1. Have a standard account for daily use.
We'll need a user account with administrative acces, and of course a Mac.
(Images taken from OS X 10.7.2 "Lion").
During setup, Mac OS X creates a user account that is an administrator on the system. This is necessary for getting things configured, but a liability from a security perspective. Open the System Preferences and choose the "Users & Groups" applet

Click the lock icon to authenticate with your current password, then click the plus sign to add a new user account. The default is to create a standard user account, which is what we want here.
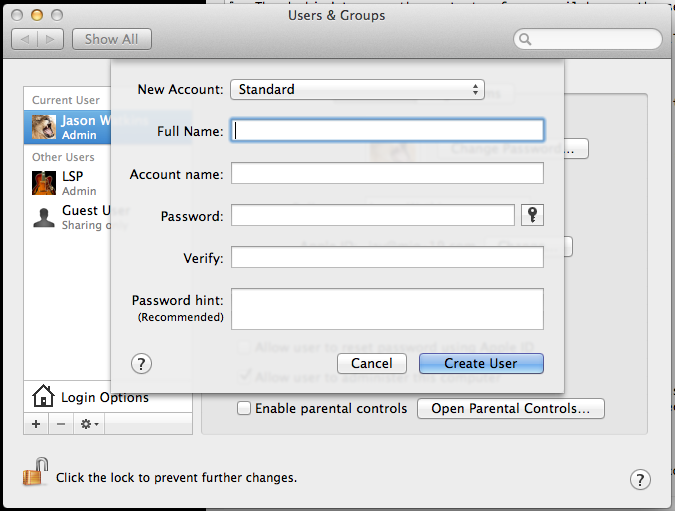
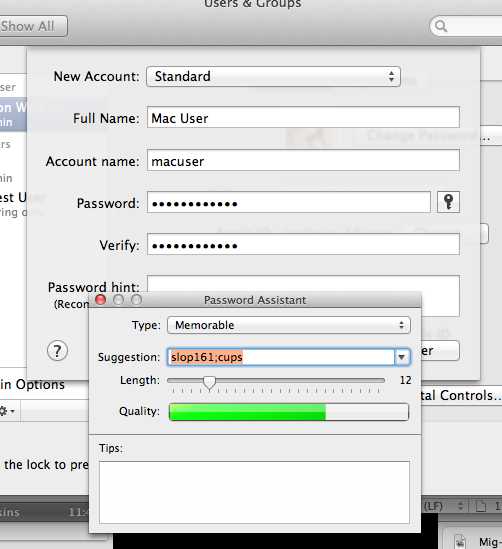
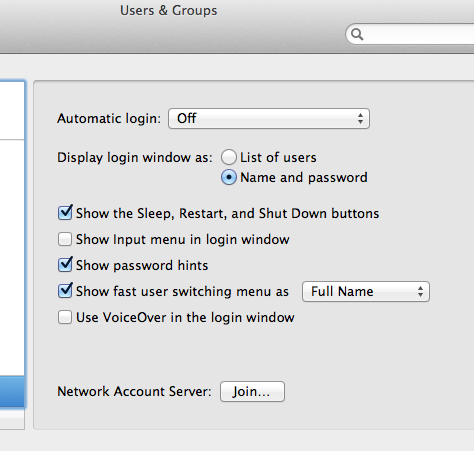
Enter the appropriate information and click "Create User". An enhancement to account security is to have a username, which is not based on the user's proper name. Things like nicknames, aliases, or words based on a determined naming convention are great for this type of practice. Using a wacky name for one's user account forces an adversary to figure two items, the username and the password, instead of just the password. This is providing the login options are set to disable automatic logins and display the login window as username and password (not the default). Strong passwords which are not based on dictionary terms are always the best idea. The key icon, to the right of the password field can suggest passwords of varying strength.
The above steps create a standard account. As stated, the first account created on a Mac, during setup, is already an administrator. Ideally, the newly created account should be the administrator and the first account demoted to that of a standard user. To do this, select the first account and uncheck the check-box titled "Allow user to administer this computer". Then, go to the newly-created account and check the same box, "Allow user to administer this computer". The first account will now be a standard account and the new one will be the admin. Administrative privilege can now be exercised by enting the new account's username and password in the keychain prompt when necessary.

2. Change your keychain password.
OS X stores user access credentials in a sub-system called "Keychain". Despite being a security caution, keychain is very convenient and helps remember the many usernames and passwords required to participate in the interactive web.
Keychain's defaults are to sync the login keychain password with the user's account password. As a result, when a user logs in, they unlock their keychain transparently in the background. Access to e-mail, bank web-sites and corporate networks can be had, easily, just by logging in to Mac OS.
The keychain's settings are managed by the Keychain Access applet, in the Utilities folder.

Opening the Keychain Access will display all of the stored items associated with the current account. The keychain "login" is the item in question for this password change.
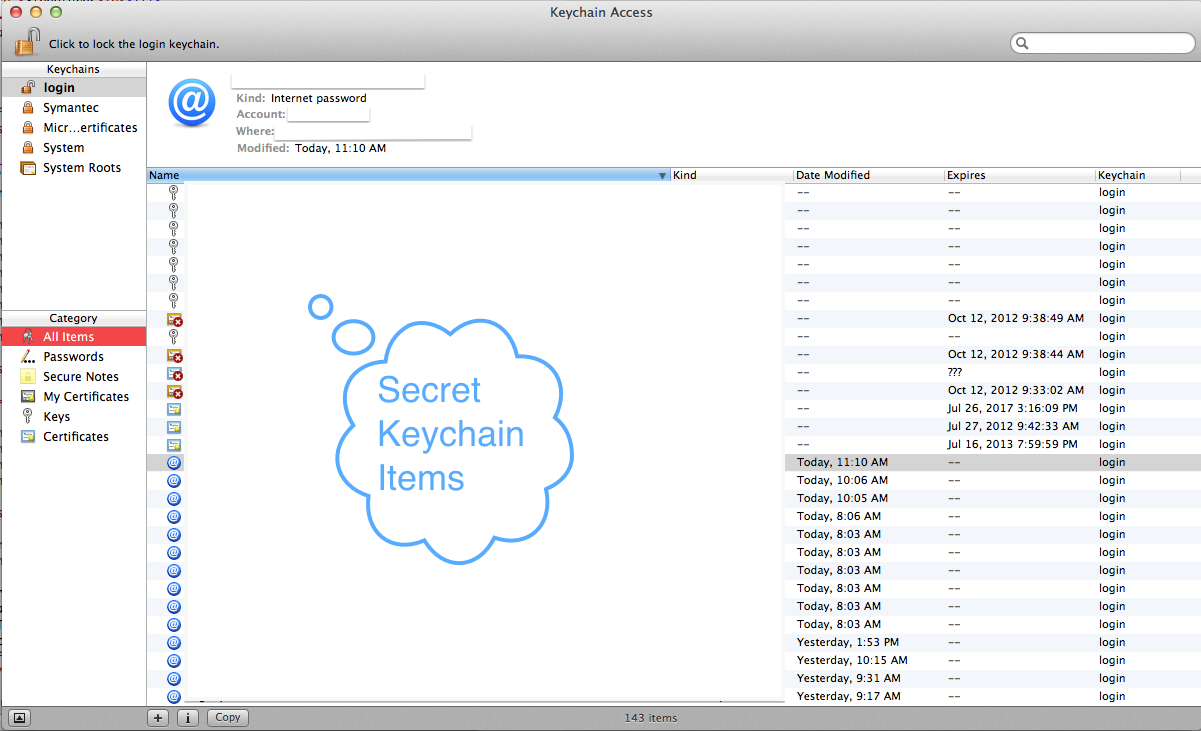
Go to the Edit menu and choose "Change Password for Keychain "login".

Enter the existing keychain password (the login password) and the new keychain password twice. Make note of the new keychain password and the fact that it was changed. The next time the user logs in to the Mac, an additional keychain password prompt will appear, asking to unlock the keychain.

3. Keep your Mac updated.
(this includes the installed programs, too.)
The vast majority of compromised computers stem from exploits that could have been mediated by software updates. Mac OS X will check for updates automatically as a default. Unlike Microsoft, Apple does not have a regular scheduled release cycle for updates. The amount of vulnerabilities for OS X is significantly lower than that of it's main competitor, but that doesn't absolve it of risk. Macs can get viruses, just they are a very small target at this time.
A school of thought exists that the latest updates have the potential to damage existing functionality. This notion has been proven true many times and has fostered a "wait-and-see" approach to new updates. I am a big believer in if it is not broken, don't fix it, but updates are an important part of system maintenance. A week after the updates have been released is not a bad time to download and install the latest updates from Apple. Other software packages have their own update mechanisms. Microsoft Office, Adobe Flash/Reader, Mozilla Firefox/Thunderbird seemingly update almost constantly. Two of the largest culprits for introducing mal-ware to a system are the web browser and Flash. Keep the programs, used every day, up to date as best as possible.
There a couple of ways to get to OS X's update program, "Software Update". The first method is from the Apple menu to the top-left. Choosing Apple (), Software Update... will open the update program as will going in through System Preferences and choosing the Software Update applet. Either method lauches the same application.
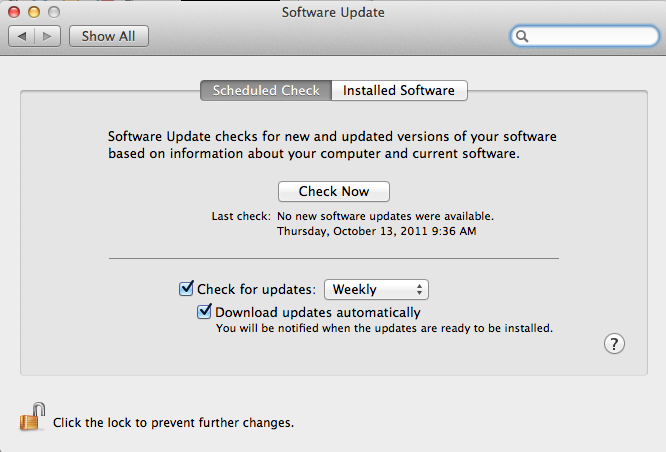
Make sure "Download updates automatically" is selected and that the updates come at a regular interval. Checking once every week is fine. Administrative access is required to install any updates on Mac OS X.
4. Turn off all unnecessary file sharing.
OS X makes sharing files with other computers very easy. Just enable sharing in System Preferences and place your items in /Users/username/Public, that's it. Public items are available as well as the entire disc and the user's profile. This can be very convenient, but also very compromising.
If no sharing is needed, or is only needed on an occasional basis, the file sharing services should be shut off. There is no sense in providing multiple doors for access, if you are the only one going in and out.
File sharing settings are available in OS X's System Preferences, under "Sharing". There are many different sharing options available, disable the ones that are not needed. Information on exactly what each file sharing service does can be found on Apple's File Sharing web-site.

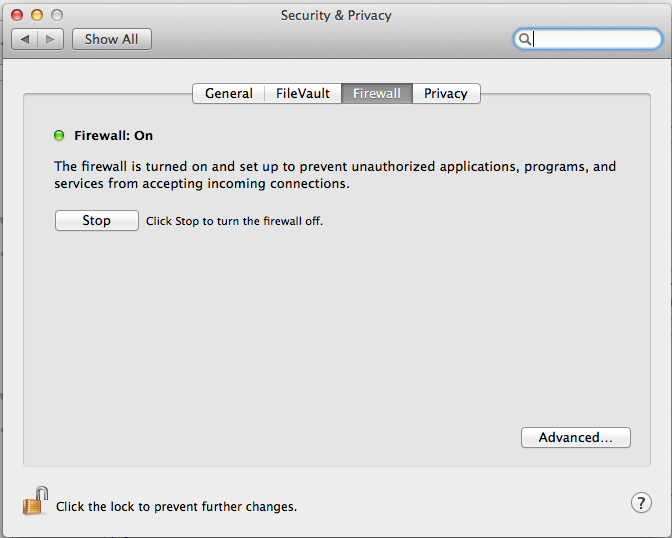
5. Turn on the built-in firewall.
A firewall is a piece of hardware, or software that protects a computer from network attack. The firewall that ships with OS X is a software firewall and very easy to configure. Unlike many other firewall products, one does not have to be a security expert to use OS X's firewall.
The firewall is located in System Preferences, under Security & Privacy. A simple click enables the firewall with basic coverage.
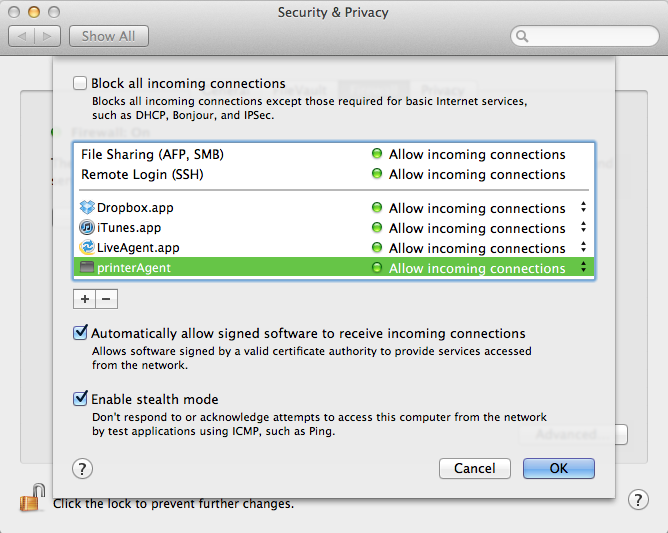
The Advanced button provides more functionality, depending on the desired level of security. The best bet is to use the most secure setting and scale-back as needed. The "Block all incoming connections" setting is the logical equivalent to building the walls of Troy around your computer. Keep in mind those walls were eventually breached through unconventional means. Use this setting in places like coffee shops, Internet cafes and in any presence of doubt as to how strong the firewall should be. The second option, requiring signed software, allows only programs with valid third-party certificates and those the user sanctions in through the firewall. Stealth Mode hides the computer by ignoring communication from unsolicited network traffic. Safe, but not secure.
6. Backup your data.
Backup is seldom thought of when it comes to computer security, but is nonetheless an important component. The data stored on computers is the result of hours of work and effort. Without the data, there is little need for the computer. An unassociated part of a computer that is often overlooked are the numerous configuration settings, keychain items, and installed software. Recreating those items can take much longer than recovering the actual data that created them.
Having control of the data, stored on a computer's hard drive is a key element of security. A separate copy, stored off the computer, provides a level of control that renders the original copy less critical. From the accidental file deletion to all-out computer theft, a backup copy can make an unpleasant experience less stressful. In the example of a laptop being stolen, a backup copy can be used to determine what type of data was on the hard drive at the time of theft.
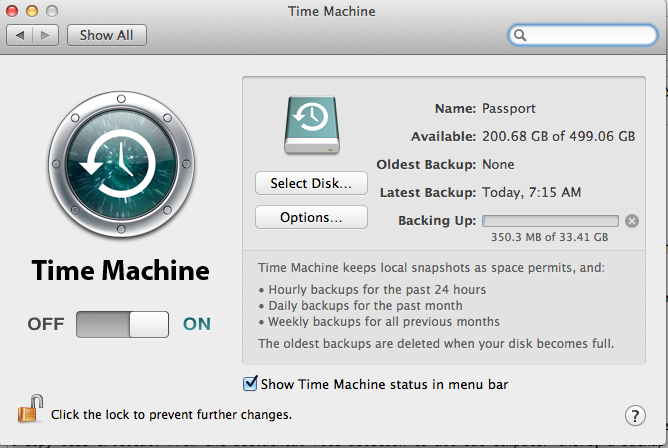
Starting with OS X 10.5 "Leopard", the backup program "Time Machine" was included with all Macs. Time machine uses an image-based backup system to make periodic and complete backups of a Mac's hard drive. All one needs to do is attach an empty USB or Firewire drive to their Mac and let Time Machine do the rest. The external hard drive should at least equate the size of the Mac's hard drive, if not exceed it. For around $100.00 a practical and concise solution can be put into place very easily, by any Mac user.
Time Machine is not the only backup option for OS X. There exist the option to simply make a copy of an important file to another location. New features like "Auto-Save" and "Versions" work with Apple software, running on OS X 10.7 to provide a shadow copy-like functionality as seen in Windows 7. Shirt Pocket Software's "SuperDuper!" makes on-demand and scheduled disk images of a selected location on a Mac's hard drive.