How
to Compose and Publish a Simple Webpage
A step-by-step guide for
composing a
publishing a simple webpage on the “mail.sas” server
Composing
Your Simple Webpage Using SeaMonkey
Ø
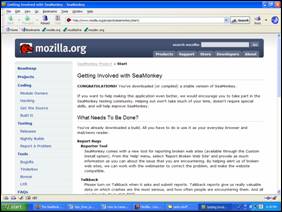
If
you do not have SeaMonkey, go to the Mozilla website (http://www.mozilla.org/projects/seamonkey)
and download the software. Follow your
operating system’s guidance to load the software onto your computer.
Ø
Once
you have successfully loaded the software onto your computer, open up
SeaMonkey
through your start button, or through the shortcut place on your
desktop.
Ø
You
will see that SeaMonkey looks like a web browser. In
fact, you can use it as a web
browser! However, we will be using
another function of SeaMonkey, its composer utility.
Ø
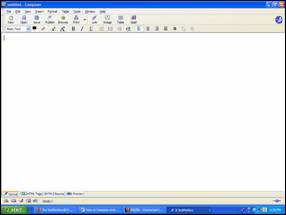
Go
to the “File” drop-down menu and choose “New” and “Composer Page”. This will open a new document that you can
edit, much in the way you would use and edit a word processing document. The difference is that SeaMonkey turns what
you are typing into html (hypertext markup language), the language that
will
make it possible for your document to be seen on the internet, once you
upload
it (we’ll talk about that in a moment).
In fact, if you look at the bottom of your screen, you will see
a button
marked, “<HTML> Source”. If you
click this button, it will reveal the html that SeaMonkey has written
to
reflect what you have been typing on the page.
Ø
Again,
compose your page much as you would a word processing document. The commands are slightly different in some
cases, but not radically different. You
can change the size and type of font.
You can past in images and pictures.
You can change the color of the text and background. Most of these are completed under the
“Insert” drop-down menu or the “Format” drop-down menu, just like a
word
processing program. There are a few key
things to remember that are very different from a simple word
processing
document.
o
First
- You will be controlling size by choosing what purpose the text has
under
“Paragraph” in the “Format” drop-down menu.
You can further change the size by choosing “Size” under the
“Format”
drop-down menu. Remember, however, that
size is relative. What might be XX-Large
for body text may be small for a headline.
o
Second
- When you want to link some text to another website or document, you
must
complete the following actions: 1) Highlight the text, 2)
Click “Insert” and “Link”,
3) Type in the URL of the website (the
website address), or locate the location of the document by clicking
“Choose
File”, 4) Once the address is typed, or
the location of the document found, click “OK”.
This will attach a link to that text that will direct the
website reader
to that new location.
o
Third
– Pictures take up a lot of space. You
can just copy and paste a picture into your document, but this will eat
up your
date allotment. For now, this is
adequate, but in the future, you’ll want to link to the image’s
location
elsewhere. Let’s keep it simple for now,
though.
Ø
Finally,
just as in a word processing document, you can tidy up the location of
your
text by using a table. Technically,
you’ll want to learn how to use html to put in divisions and breaks,
but again,
for now, let’s keep it simple.
Ø
Once
you have finished composing your simple webpage, be sure to save. When you save, since this will be your
homepage, to which all your other pages will be linked, name it “index”
and of
course, save it as html! When you are
naming future pages or saved images, make sure you avoid capital
letters and
spaces. These muck up the recognition
program a little. Also, make sure you
save it into a folder that you will be able to find, easily, once
you’re ready
to upload. It makes sense to create a
special folder in “My Documents” marked with a name like, “website
work” or
“webpages” so that you know immediately where it is.
Publishing
Your Simple Webpage Using Filezilla
Ø
Once
you have completed and saved your simple webpage, you’re ready to
upload your
document to the mail.sas server. Since
you’ve
already set up your Site Manager account when you learned about
transferring
files, you are ready to go.
Ø
Open
up Filezilla and connect to your mail.sas Site Manager account.
Ø
From
here, it is exactly the way you upload any file to the mail.sas server,
because
that is exactly what you are doing. Look
in the left-hand column that shows the stuff that is on your computer. Search for your index.html document.
Ø
Once
you have found it, make sure that your “html” folder is open on the
right-hand
column.
Ø
Then
drag-and-drop the index.html document into your “html” folder, or just
double-click on index.html.
Ø
Once
this is complete, you might want to check to make sure that the
permissions for
that document are set so that the document can be executed and read on
the
internet. Just right click on your
index.html document in the right-hand column and choose “File
Attributes”. Make sure that the “Read” and
“Execute” boxes
are checked for each, and “Write” is checked for you.
Ø
In
addition, any images or other special files that you include in your
webpage
must also be placed in your html folder.
Ø
Now,
go to your web browser and type in the URL for your website. It should be there!
Ø
Finally,
if you ever make changes to your site, refresh your FileZilla screen
(button
with the green arrows), then go through the same process.
BE CAREFUL!
Don’t accidentally copy over a document that you want to keep!
K. Sundeen